Are Milanians working on a construction project using Hebel? If so, understanding how to install lightweight bricks is an important step to ensure that the structure is straight and sturdy.
Proper installation determines the quality of subsequent work, from plastering to finishing. Minor mistakes—such as an uneven subfloor, bricks that are too wet, or the use of the wrong adhesive—can cause the wall structure to shift, lead to wasted materials, and even trigger cracks.
So, don’t install Hebel blocks carelessly if you don’t want the joints to come apart and the walls to crack easily. Check out the complete guide below!
Preparations Before Installing Lightweight Bricks, According to Professionals
1. Make Sure the Foundation or Footing Is Completely Ready
Make sure the foundation or footing is strong enough and does not have any issues such as cracks or shifting. The surface of the footing that serves as the base for the wall should also be checked to ensure it is not too uneven.
If there are differences in elevation, level the surface first. An uneven starting point will cause the error to increase as the lightweight brick structure gets taller.
2. Clean the Subfloor and Make Sure It’s Level
Clean the installation area of dust, sand, cement residue, oil, and other debris. A dirty surface can reduce adhesion between the wall surface and the adhesive.
Check the level using a spirit level or an appropriate measuring tool. If the subfloor is too uneven, make any necessary repairs before installation begins so that the first row of lightweight bricks serves as an accurate reference for the subsequent rows.
3. Check the Humidity and Make Sure It Does Not Exceed the Tolerance Limit
The condition of the lightweight bricks and the substrate must be checked before applying the adhesive. Avoid installation on surfaces that are too wet, waterlogged, or still have a moisture content that does not meet the adhesive’s recommendations.
4. Gather the Necessary Tools and Materials
Prepare all your tools before you start working so that the installation process isn’t frequently interrupted. Some commonly used tools include a spirit level, a tape measure, a rubber mallet, a measuring string, a lightweight brick saw, a trowel or adhesive applicator, and a surface cleaner.
The main materials you’ll need to prepare are, of course, lightweight bricks and a special adhesive for lightweight bricks. With the materials already on hand at the work site, installation can be carried out more quickly and efficiently.
5. Check the lightweight bricks to ensure they are the correct size and level.
Not all lightweight bricks delivered to the site are automatically ready for installation. Inspect each brick to ensure there is no severe damage, broken pieces, or excessively uneven surfaces.
Bricks with uneven surfaces can be smoothed out using the appropriate tools. A smoother surface provides a better contact area for the adhesive and helps produce more consistent joints.
6. Determine the Starting Line for the Hebel Layout
Determine the position of the wall using a measuring string or marking line. Make sure the corner points, wall length, and the positions of doors, windows, and where the wall meets the columns match the working drawings.
The first row must be laid with great care, as it serves as a reference for the subsequent rows of lightweight bricks. Use a level periodically to ensure that the bricks remain horizontal and vertical.
See Also: 8 Mistakes When Installing Lightweight Bricks That Cause Walls to Crack Easily
How to Calculate the Quantity of Lightweight Bricks Needed per m²
It’s important to calculate your lightweight brick needs before purchasing the material so that you don’t end up with too few or too many bricks. The most commonly used sizes for lightweight bricks are 60 × 20 × 7.5 cm, 60 × 20 × 10 cm, and 60 × 20 × 12.5 cm.
1. First, Determine the Wall Area of the Building
Multiply the length by the height of the wall.
For example, a wall is 5 meters long and 3 meters high:
8 m × 4 m = 32 m²
If there are doors or windows, the area of those openings should be subtracted from the wall area to ensure a more accurate calculation.
2. Find the Surface Area of a Single Lightweight Brick
The area to be calculated is the length × height of the brick, not its thickness.
For 60 × 20 cm lightweight bricks:
0.6 m × 0.2 m = 0.12 m²
Thicknesses of 7.5 cm, 10 cm, or 12.5 cm do not change the surface area covered because the length and height are the same.
3. Calculate the Number of Lightweight Bricks per m²
Once you know the area of one brick, divide 1 m² by that area:
1 ÷ 0.12 = 8.33 bricks
This means that, theoretically, about 8.33 lightweight bricks are needed per square meter. In practice, this number needs to be adjusted based on the cuts and on-site conditions. A similar calculation yields a requirement of about 8–9 bricks per square meter.
4. Calculate the Total Quantity of Lightweight Bricks Required
If the wall area is 32 m²:
32 × 8.33 = 266.56 bricks
Since it is not possible to purchase 266.56 bricks, the total was rounded up to approximately 267 lightweight bricks before adding the reserve.
5. Add a Supply of Lightweight Bricks in Case of Damage
Milanians should set aside a reserve of about 5–10% to account for cuts, damage, or the need for adjustments in the field.
If the initial requirement is 267 bricks, then:
5% = 13.35 bricks → about 14 bricks
10% = 26.7 bricks → about 27 bricks
So, the purchase requirement could be in the range of 281–294 bricks, depending on the project conditions and the number of cuts.
How to Install Lightweight Bricks for a Neater, More Precise, and Sturdier Result
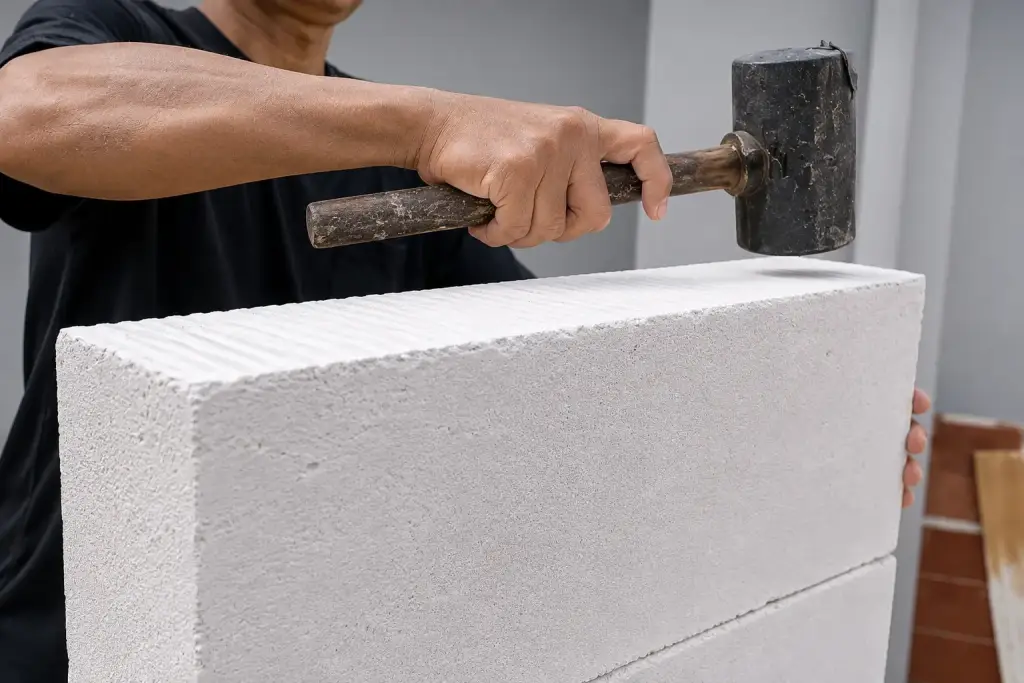
1. Make sure the Hebel surface is clean and level
The most important step in installing lightweight bricks is to clean the surface of the bricks to remove dust, sand, oil, moss, or dirt. If there are any protruding areas, smooth them out first to ensure optimal contact with the adhesive.
2. Soak or Wet the Hebel Before Bonding It
Do not immediately soak the lightweight bricks in water without following the adhesive’s instructions. Bricks that are too wet can affect the bonding process.
If the ground is very dry or the material requires moistening, simply dampen it lightly and make sure there is no standing water on the surface.
3. Use Special Adhesive for Lightweight Bricks to Make Them More Sturdy
Use an adhesive specifically formulated for lightweight bricks. Specialized adhesives help create thin, strong joints that are more practical than those made with conventional mixtures.
One option available to Milanians is Milan Lightweight Brick Adhesive which is a ready-to-use adhesive with strong bonding power and a drying time of about 5 minutes.
4. Make Sure the Surface Is in Proper Condition Before Bonding
Next, before applying the adhesive, check the condition of the brick surface again. Make sure there is no dust, oil, moss, or standing water.
For Milan Lightweight Brick Adhesive, the substrate surface should be clean and dry. This ensures that the adhesive bonds easily, providing strong adhesion and preventing it from coming loose.
5. Apply the adhesive in two straight, elongated lines on the surface
Apply Milan Lightweight Brick Adhesive in two straight, longitudinal lines on the surface of the bricks. Do not apply too much adhesive, as this will not necessarily make the joints stronger.
6. Apply, Secure, and Position the Lightweight Bricks
Place the next brick immediately after applying the adhesive. Position it carefully so that the wall line remains straight and the joints are tight.
Use a rubber mallet to help seat the bricks and adjust their position without damaging their surfaces. Double-check the level using a spirit level.
7. Wait a Few Moments Until It’s Fully Set
Do not immediately apply any weight or move the bricks after installation. Allow the adhesive to set and dry according to the product’s recommended time.
Milan Lightweight Brick Adhesive has a drying time of about 5 minutes, but be sure to follow the application instructions and take actual on-site conditions into account.
8. Repeat the Application Process for the Next Hebel Panel
The final step in installing lightweight bricks is to continue laying the next bricks in the same pattern. Check the alignment, levelness, and position every few courses to prevent errors from accumulating.
Don’t wait too long after applying the adhesive. It’s best to lay the next brick immediately after applying the adhesive to ensure optimal adhesion.
The Benefits of Using Milan Lightweight Brick Adhesive
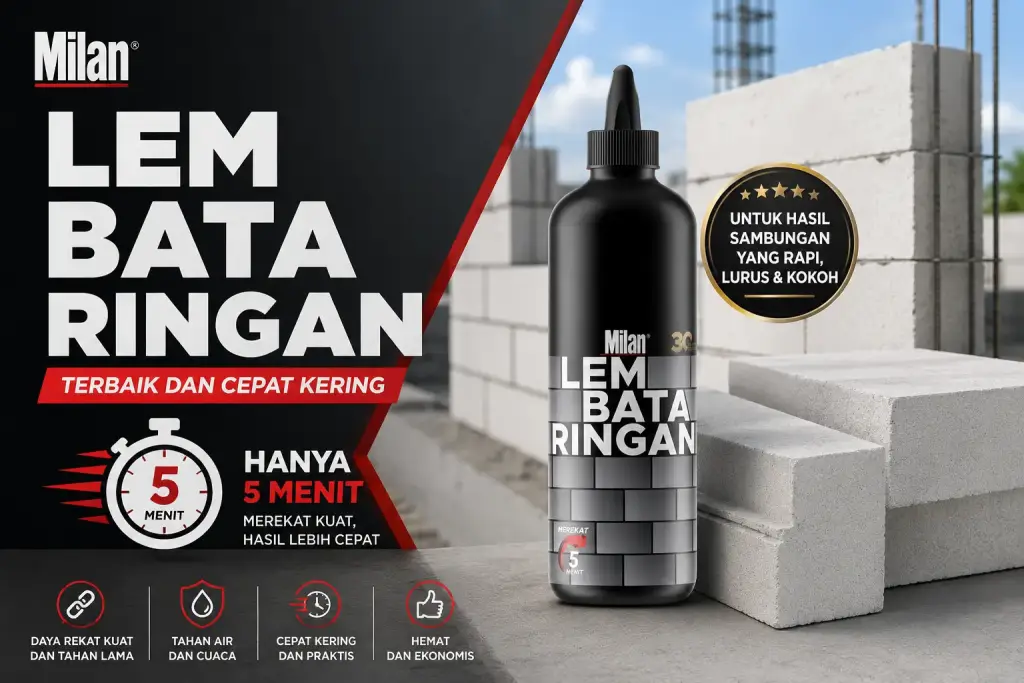
The use of a special adhesive for lightweight bricks is not without reason; rather, it is intended to ensure that the joints remain strong and sturdy.
Therefore, wearing Milan Lightweight Brick Adhesive is the best choice Milanians can make when working on construction projects using Hebel.
Milan offers lightweight brick mortar with a special formula that provides strong adhesion and is suitable for construction projects. Other advantages include:
- Dries quickly and sets in about 5 minutes
- Ready-to-use single-component formulation
- No additional mixing required
- Cost-effective and economical
- Strong and long-lasting adhesion
- Water- and weather-resistant
- Helps improve work productivity
- Suitable for lightweight bricks and various other stone materials
- A 0.5 kg package is sufficient for approximately 15–18 m², depending on application conditions
FAQ (Frequently Asked Questions)
What Is the Ideal Thickness for Lightweight Brick Adhesive?
Lightweight brick adhesive should be applied in a thin, even layer according to the product recommendations, rather than as thick as conventional mortar. The actual thickness may vary depending on the type of adhesive and the application method. For Milan Lightweight Brick Adhesive, follow the application pattern of two longitudinal lines as outlined in the product instructions.
When Should Lightweight Bricks Be Cut, and How Do You Cut Them?
Lightweight bricks need to be cut when the dimensions at the ends of walls, corners, door and window openings, or structural joints do not match the dimensions of a whole brick. Use a saw specifically designed for lightweight bricks to ensure straighter, more precise cuts and minimize material waste.
Why Do Lightweight Brick Walls Crack After Installation?
Cracks can be caused by various factors, such as structural movement, improper joints, an unstable subgrade, installation errors, or improper finishing. Therefore, it is necessary to check the alignment, joints, and structural condition from the very beginning of installation.
Do Lightweight Bricks Need to Be Soaked in Water Before Installation?
Not always. Lightweight bricks should not be soaked indiscriminately, as the moisture conditions must be adjusted to the adhesive system being used. For Milan Lightweight Brick Adhesive, the surface to be bonded must be clean and dry before application.
Use Milan Lightweight Brick Adhesive for Neat, Straight, and Strong Joints!
If you want a more practical way to install lightweight bricks without compromising the quality of the joints, use an adhesive that’s specifically designed for lightweight bricks.
Milan Lightweight Brick Adhesive It comes in a ready-to-use formulation, offers strong adhesion, and dries quickly—in just 5 minutes—to help construction projects run more efficiently.
What’s more, this adhesive is also water- and weather-resistant, which makes the bond even stronger and more durable.
Still not sure how to install lightweight bricks with special adhesive? Consult Milanians about your construction project needs Join the Milan Expert Team by clicking the banner below!