Have you ever seen vinyl flooring that’s bubbling, has gaps between the planks, or even peeling at the edges? It was just installed a short while ago—so why does it already look so bad?
It’s possible that the problem the Milanians are experiencing is due to an unnoticed mistake made when installing the vinyl flooring in the first place. Simply measuring, cutting, and laying the vinyl on the floor isn’t enough.
Otherwise, the result won’t look neat and the flooring will shift easily. So, if you’re planning to install vinyl flooring, avoid these common mistakes that can prevent you from achieving the best possible result.
What are some common mistakes to avoid when installing vinyl flooring? Check out the full details below!
What Do You Need to Prepare Before Installing Vinyl Flooring?
1. Check the Condition of the Ground Floor; Make Sure It Is Clean
Before installing vinyl, check the condition of the subfloor first. Make sure the surface is level, dry, and free of dust, oil, sand, and any construction debris. A surface that is uneven or has debris on it can prevent the vinyl from adhering properly, resulting in an uneven finish.
2. Measure the Room's Area
Don’t cut the vinyl right away before you know the exact dimensions of the room. Measure the length and width of each area, including any irregularly shaped sections. It’s best to have a little extra material on hand to account for cutting errors or the need for additional pieces.
3. Choose the Right Type of Vinyl to Suit Your Needs
Not all types of vinyl flooring have the same characteristics. Choose the material based on the installation location, the room’s activity level, durability requirements, and the installation method. Vinyl for high-traffic areas certainly requires different considerations than vinyl for rooms with light use.
4. Gather the Tools and Materials You’ll Need
Prepare all your tools before you start working, such as a measuring tape, pencil, ruler, sharp utility knife, roller or pressure tool, and the appropriate adhesive. With all the necessary tools on hand, Milanians won’t have to stop in the middle of a project just because they’re missing something.
5. Don’t Forget to Determine the Pattern and Direction of Installation
Determine the direction of the vinyl before you begin installation. For long, narrow rooms, the direction of the vinyl planks can usually be adjusted to match the shape of the room so that it looks more proportional. Also, plan the placement of the seams so that the vinyl pieces don’t look disorganized.
See Also: Key Differences Between Vinyl Adhesive and Regular Wood Glue You Should Know
Vinyl Flooring Installation Mistakes to Avoid
1. The Ground Floor Surface Was Not Properly Prepared
The most common mistake when installing vinyl flooring is failing to prepare the subfloor first. Dust, moisture, uneven surfaces, or debris can interfere with adhesion. As a result, the vinyl may shift, bubble, or lift in some areas.
2. Inappropriate Patterns and Layouts
A common mistake made when installing vinyl flooring is failing to plan the pattern in advance, which can result in the seams looking untidy. This is especially true in narrow areas or rooms with asymmetrical shapes. It’s best to do a dry layout or placement simulation before permanently adhering the material.
3. Errors When Measuring the Width and Length of the Floor
An error of just a few centimeters can result in a vinyl strip that’s too short or leaves an unwanted gap. Measure each side of the room; don’t rely on just one measurement point, because the walls may not be perfectly straight.
4. Forgetting to Account for Corners, Cabinets, and Ventilation Openings
Areas with corners, posts, cabinet legs, doors, or ventilation openings require more detailed measurements. Do not force a square cut. Create a template first so that the vinyl can conform to the shape of the area with precision.
5. Installing Vinyl Panels in the Wrong Direction
The direction of installation greatly affects the room’s appearance. Vinyl planks installed without considering the direction of light, the shape of the room, and the pattern between planks can make the final result look less cohesive. Choose one main direction and maintain consistency.
6. Ignoring Environmental Conditions During Installation
Room temperature and humidity can affect the materials and the installation process. Do not install vinyl on surfaces that are still damp or in environmental conditions that do not comply with the product instructions. Make sure the work area provides conditions conducive to the installation process.
7. Not Using High-Quality Specialized Adhesives
Using the wrong adhesive can prevent the vinyl from achieving optimal adhesion. The right adhesive helps keep the material in place and results in a neater installation.
To ensure the vinyl adheres perfectly, Milanians can use Milan Vinyl Glue a water-based adhesive specifically designed for installing vinyl flooring and carpet. In fact, this vinyl adhesive can also be applied to various substrates such as ceramic tile, concrete, wood, and plywood.
8. Not Aligning the Wall Trim and Door Frame
Pay close attention to where the vinyl meets the wall trim or door frame from the very beginning. If the cut is too tight, the result may look cramped, while a cut that’s too loose will leave a gap. Measure and cut neatly along the contours of the area.
9. Using the Wrong Tools or a Dull Knife
This mistake in installing vinyl flooring is related to the use of the wrong tools. A dull cutter can result in jagged, imprecise cuts. This is especially noticeable at the corners and edges of the vinyl. Use a sharp knife and a sturdy measuring tool to make cutting easier to control.
10. Not Paying Attention to the Joints
Improper seams can cause the vinyl to start lifting or peeling. Make sure each piece fits together neatly and that there are no large gaps. When applying adhesive, apply even pressure to the bonded area to ensure a strong bond.
11. Not Allowing Vinyl Flooring to Adjust to Room Temperature
Vinyl should be allowed time to acclimate to the room’s conditions before installation. This step is important because the material may undergo dimensional changes due to temperature fluctuations. Ignoring this can increase the risk of the vinyl shifting out of place after installation.
How to Install Vinyl Flooring So It Doesn’t Shift Easily and Adheres Perfectly
1. Make Sure the Floor Is Clean and Dry
Clean the entire surface of dust, sand, oil, and other debris. Make sure the floor is completely dry before applying the adhesive. A wet or dirty surface can reduce the adhesive’s bonding strength.
2. Let the Vinyl Sit for a While to Acclimate to the Room
Before installation, lay out the material in the installation area and allow time for it to acclimate to the room’s conditions. The purpose is to prevent the vinyl from immediately changing dimensions after it is installed.
3. Use a Special Adhesive and Apply It According to the Instructions
Use an adhesive specifically designed for vinyl flooring. Apply it evenly at the thickness recommended by the product.
If Milanians use Milan Vinyl Glue, apply it to one side of the surface, then wait about 10 minutes until the white color turns clear before applying the vinyl.
See Also: High-Quality Vinyl Adhesive for the Modern Furniture and Interior Design Industries
4. Install the Vinyl and Secure It to the Subfloor
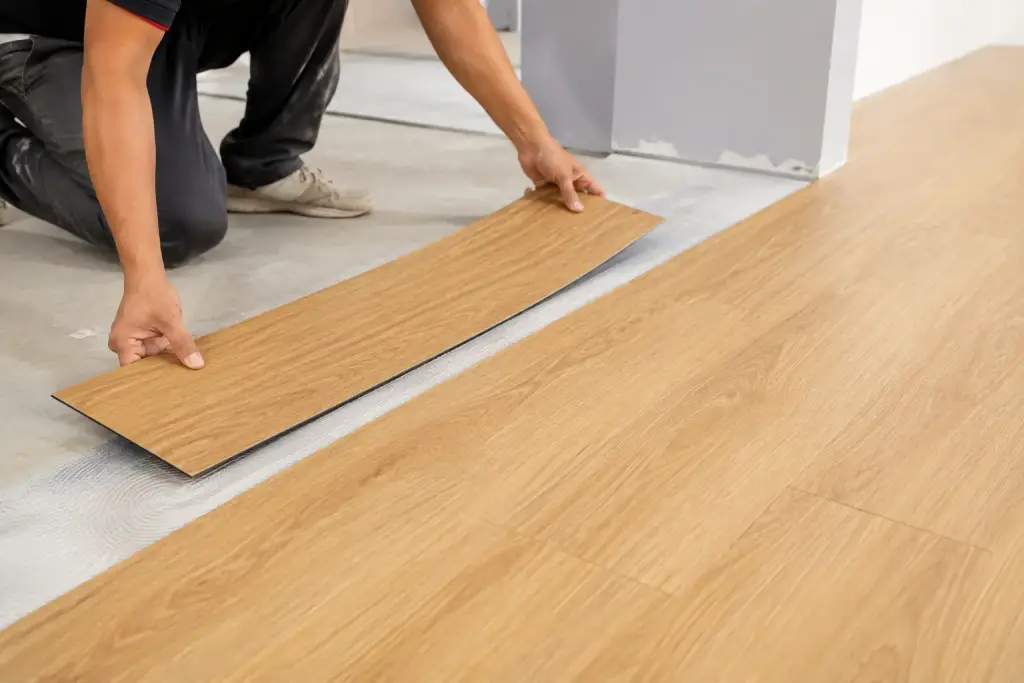
Once the adhesive is ready, position the vinyl slowly and carefully. Don’t rush, because once it’s adhered, it will be much harder to adjust the position of the material. Press the surface evenly so that the vinyl adheres perfectly and no parts remain lifted.
5. Check the Seams and Edges of the Floor
Once all the material has been installed, double-check the seams, corners, and edges of the floor. Make sure there are no areas that are bubbling, peeling, or not adhering properly.
6. Wait a Few Moments and Don’t Put Weight on the Floor Right Away
Do not immediately place heavy furniture on the floor or engage in strenuous activities after installation. Allow time for the adhesive to bond properly. Also, avoid dragging heavy objects across the newly installed floor.
Why Should You Use Milan Vinyl Adhesive During Installation?

Choosing the right adhesive is about more than just getting the vinyl to stick. The right adhesive helps keep the material in place, ensures a neater installation, and reduces the risk of the vinyl shifting or peeling up.
Therefore, the recommendation is Milan Vinyl Glue Designed for vinyl flooring and carpet. It includes a water-based adhesive, enabling Milan Vinyl Adhesive to deliver a neater, stronger, and more durable installation.
It is suitable for use on various surfaces, such as ceramic, concrete, wood, and plywood. It is also quite easy to apply, as it only needs to be applied to one side of the surface.
Not only that, but there are still many other benefits of Milan Vinyl Adhesive that Milanians can discover, namely:
- Convenient with a single-sided application
- Water-based
- Environmentally friendly
- Strong adhesive strength
- Efficient to use
- Suitable for vinyl floors and carpets
- Can be applied to ceramic tiles
- Can be used on concrete, wood, and plywood
- Available in 1 kg, 4 kg, and 20 kg packages
FAQ (Frequently Asked Questions)
How Wide Should the Gap Be Around Vinyl Flooring?
The size of the gap depends on the type of vinyl and the installation method, so Milanians should follow the manufacturer’s instructions. For areas that require expansion space, the gap can later be covered with trim or molding to ensure a neat finish.
Can Vinyl Flooring Be Installed Over Tile or Concrete?
Yes, as long as the surface meets the necessary conditions for installation. The floor must be clean, dry, sufficiently level, and free of dust and debris. Milan Vinyl Adhesive can be applied to ceramic tile, concrete, wood, and plywood substrates.
Do Vinyl Floors Require an Additional Underlayment?
Not always. The need for an additional layer depends on the type of vinyl, the condition of the subfloor, and the installation system used. If the subfloor already meets the material specifications, installation can be done without adding any unnecessary layers.
Can Vinyl Flooring Be Damaged If It Gets Wet?
Vinyl’s water resistance depends on its type and construction. However, this does not mean that the entire installation system is free from the risk of moisture. Water that seeps in through seams or remains under the material for too long can affect the subfloor and the adhesive. Therefore, the installation area must be kept dry, and proper water management is essential.
What Should You Do If Your Vinyl Flooring Peels or Bubbles?
The problem may stem from a damp or dirty subfloor, an unsuitable adhesive, uneven adhesive application, or an improper installation process. If only a portion of the area is affected, that section can be inspected and repaired by ensuring the subfloor is clean and using the adhesive according to the instructions.
Milan Vinyl Adhesive: The Best Solution with Strong, Long-Lasting Adhesion and a Neater Finish
Have you measured and prepared the floor properly, but are still unsure about which adhesive to choose? Don’t let a meticulously executed installation process go to waste just because you used the wrong adhesive.
Milan Vinyl Glue Specially designed for vinyl flooring and carpet installation, it offers practical application, strong adhesion, and compatibility with a variety of substrates. Available in 1 kg, 4 kg, and 20 kg sizes, so Milanians can choose the right size for their project needs.
Interested in using Milan Vinyl Adhesive? Go ahead Contact the Milan Expert Team by clicking the banner below!