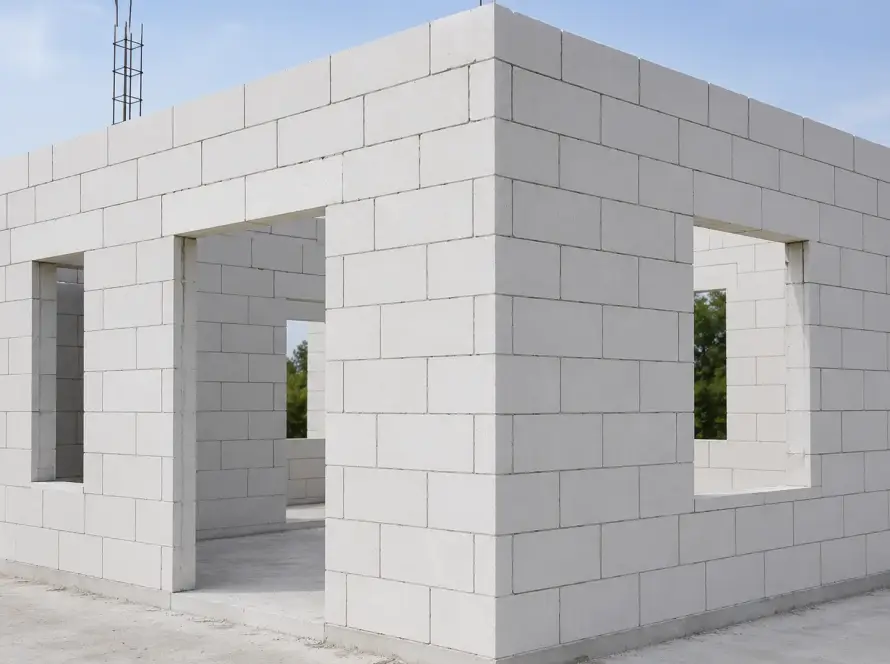
Pernah melihat dinding yang sudah diplester tetapi masih terlihat kasar? Atau justru ada dinding yang tampak halus, tetapi beberapa waktu kemudian muncul retak-retak kecil?
Salah satu penyebabnya bisa terjadi sejak awal, yakni adanya kesalahan dalam melakukan plesteran maupun acian. Mungkin terlihat sepele, tapi plesteran dan acian berperan sangat penting dalam memastikan dinding halus dan tidak mudah retak.
Tak heran, buat Milanians yang berprofesi sebagai tukang, memahami perbedaan plesteran dan acian sejak awal sebelum mulai pembangunan rumah.
Keduanya memiliki fungsi yang berbeda, namun saling berkaitan satu sama lain, sehingga kesalahan dalam pengerjaannya bisa berdampak pada hasil akhir.
Lalu, apa sebenarnya perbedaan plesteran dan acian? Mana yang lebih penting? Yuk, simak informasi lengkapnya di bawah ini!
Mengapa Plesteran dan Acian Sama-Sama Penting untuk Dinding?
Plesteran berperan sebagai lapisan yang meratakan dan menutup permukaan pasangan bata, bata ringan, atau beton. Dinding hasil pemasangan bata biasanya memiliki sambungan, celah, serta permukaan yang belum rata.
Plesteran membuat bidang tersebut menjadi lebih seragam sekaligus memberikan dasar yang lebih siap untuk tahap finishing berikutnya.
Sementara itu, acian berfungsi menghasilkan permukaan yang jauh lebih halus setelah plesteran selesai. Lapisan acian membantu menutup pori-pori dan tekstur kasar pada plester sehingga dinding lebih siap untuk dicat atau diberi finishing lainnya.
Jadi, perbedaan plesteran dan acian bukan berarti salah satunya boleh dihilangkan. Plesteran membentuk dan meratakan dasar dinding, sedangkan acian menyempurnakan permukaannya. Keduanya bekerja sebagai satu rangkaian pekerjaan finishing dinding.
Apa Itu Plesteran dan Acian?
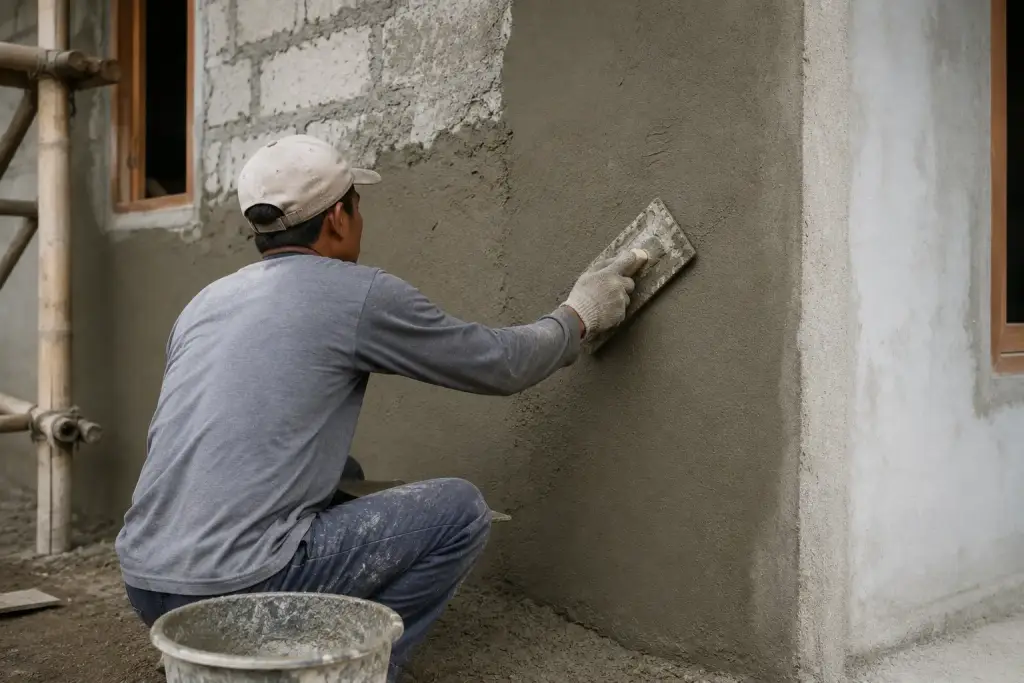
Plesteran adalah proses melapisi permukaan dinding dengan adukan semen dan pasir untuk meratakan, menutup sambungan pasangan bata, serta membentuk permukaan dasar yang lebih kuat dan seragam.
Plesteran dapat diaplikasikan pada dinding bata, bata ringan, maupun permukaan konstruksi tertentu sesuai kebutuhan pekerjaan.
Ketebalan plesteran biasanya lebih besar dibandingkan acian karena lapisan ini bertugas mengoreksi ketidakrataan permukaan dinding. Di sinilah, kualitas adukan, kondisi permukaan, teknik aplikasi, dan proses pengeringan sangat berpengaruh terhadap hasil akhirnya.
Sementara itu, acian adalah lapisan tipis berbahan dasar semen yang diaplikasikan di atas plesteran. Tujuan utamanya adalah membuat permukaan dinding lebih halus, padat, dan siap menerima lapisan cat atau finishing. Acian tidak dirancang untuk menggantikan fungsi plesteran dalam meratakan dinding yang sangat tidak rata.
Secara sederhana, plesteran bisa dianggap sebagai lapisan pembentuk dan perata, sedangkan acian merupakan lapisan penghalus dan penyempurna.
See Also: AAC vs. CLC Lightweight Bricks: What’s the Difference, and Which One Is Best for Your Home?
Perbedaan Plesteran dan Acian pada Dinding Rumah
1. Fungsi
Perbedaan plesteran dan acian yang paling mudah dilihat adalah fungsinya. Plesteran digunakan untuk meratakan permukaan dinding sekaligus menutup sambungan dan ketidakteraturan pada pasangan bata. Lapisan ini menjadi dasar sebelum dinding masuk ke tahap finishing.
Acian memiliki fungsi yang lebih berfokus pada kehalusan permukaan. Setelah plesteran cukup rata, acian digunakan untuk menutup pori dan tekstur sehingga dinding terlihat lebih halus serta lebih siap untuk dicat.
2. Bahan yang Digunakan
Plesteran umumnya menggunakan campuran semen, pasir, dan air. Jenis serta komposisi bahan perlu disesuaikan dengan kondisi permukaan dan kebutuhan pekerjaan agar adukan memiliki daya rekat serta kekuatan yang baik.
Acian biasanya menggunakan bahan berbasis semen dengan air untuk menghasilkan adukan yang lebih halus. Karena lapisannya tipis, kualitas bahan dan konsistensi adukan sangat memengaruhi hasil permukaan.
3. Ketebalan
Plesteran memiliki ketebalan yang lebih besar karena harus membantu meratakan bidang dinding. Dalam pekerjaan lapangan, ketebalannya dapat berbeda tergantung kondisi dinding dan standar pekerjaan yang digunakan.
Acian jauh lebih tipis. Lapisan ini hanya bertugas menyempurnakan permukaan plesteran, bukan untuk memperbaiki dinding yang bergelombang atau memiliki perbedaan ketebalan besar.
4. Urutan Pengerjaan
Urutan pengerjaan juga menjadi bagian penting dari perbedaan plesteran dan acian. Plesteran dikerjakan terlebih dahulu setelah pasangan dinding siap dan permukaannya dipersiapkan.
Setelah plesteran cukup mengering dan kondisinya sesuai untuk tahap berikutnya, barulah acian diaplikasikan. Jadi, secara umum urutannya adalah pasangan dinding → plesteran → acian → finishing atau pengecatan.
5. Tekstur
Permukaan plesteran biasanya masih memiliki tekstur yang relatif kasar. Kondisi ini memang wajar karena plesteran berfungsi sebagai lapisan dasar untuk membentuk kerataan dinding.
Sebaliknya, acian menghasilkan tekstur yang lebih halus dan padat. Karena berada di lapisan paling luar sebelum finishing, kualitas acian sangat menentukan apakah permukaan dinding terlihat rapi atau justru masih memiliki pori dan gelombang.
6. Hasil Akhir
Plesteran menghasilkan bidang dinding yang rata dan kokoh sebagai dasar finishing. Namun, permukaannya belum tentu cukup halus untuk langsung dicat jika hasil yang diinginkan adalah finishing yang rapi.
Acian memberikan hasil akhir yang lebih halus dan seragam. Karena itu, keberhasilan pekerjaan acian akan sangat terlihat ketika dinding terkena cahaya atau setelah dicat.
Hal yang Bakal Terjadi Jika Dinding Langsung Diaci Tanpa Plesteran
Mengaplikasikan acian langsung pada pasangan bata bukan cara yang tepat untuk menggantikan plesteran.
Permukaan bata memiliki sambungan, pori, dan tingkat ketidakrataan yang membuat lapisan acian harus bekerja terlalu keras untuk menutup perbedaan tersebut.
Akibatnya, lapisan acian dapat memiliki ketebalan yang tidak seragam. Bagian tertentu menjadi terlalu tebal, sementara bagian lainnya terlalu tipis.
Kondisi tersebut dapat meningkatkan risiko retak, mengelupas, atau menghasilkan permukaan dinding yang tetap bergelombang.
Selain itu, acian bukan material utama untuk memperbaiki ketidakrataan besar pada dinding. Karena itu, Milanians sebaiknya tetap mengikuti tahapan plesteran terlebih dahulu, kemudian acian agar setiap lapisan bekerja sesuai fungsinya.
See Also: Learn About the 8 Causes of Cracks in Wall Plaster and How to Fix Them
Kesalahan dalam Plesteran dan Acian yang Bisa Membuat Dinding Cepat Rusak
1. Permukaan Dinding Masih Kotor dan Berminyak
Sebelum diplester atau diaci, permukaan harus bebas dari debu, kotoran, minyak, dan material lain yang dapat mengganggu daya rekat. Jika permukaan masih kotor, adukan tidak dapat menempel secara optimal sehingga lapisan lebih mudah terlepas atau mengelupas.
2. Dinding Masih Terlalu Kasar, Belum Dihaluskan
Plesteran seharusnya membentuk dasar yang cukup rata sebelum masuk ke tahap acian. Jika permukaannya masih bergelombang atau memiliki tonjolan dan cekungan yang besar, acian akan sulit menghasilkan permukaan yang konsisten.
Jangan memaksakan acian untuk memperbaiki ketidakrataan yang seharusnya diselesaikan pada tahap plesteran. Setiap lapisan memiliki tugasnya masing-masing.
3. Campuran Komposisinya Keliru
Komposisi bahan yang tidak sesuai dapat memengaruhi kekuatan, daya rekat, proses pengeringan, hingga risiko retak pada plesteran dan acian.
Adukan yang terlalu banyak air, terlalu sedikit bahan pengikat, atau tidak tercampur merata dapat menghasilkan lapisan yang kurang optimal.
Oleh karena itu, komposisi campuran perlu dibuat secara tepat dan konsisten sesuai kebutuhan pekerjaan. Untuk membantu mengurangi risiko keretakan pada plesteran maupun acian, Milanians dapat menggunakan bahan campuran semen dari Milan Cement Additive.
Milan Cement Additive diformulasikan untuk membantu meningkatkan kualitas campuran semen dan daya ikat, sekaligus mengurangi risiko keretakan pada plesteran dan acian.
4. Pengaplikasian Kurang Tepat, Ketebalan Diabaikan
Pengaplikasian yang tidak merata dapat membuat sebagian area memiliki lapisan terlalu tebal dan area lainnya terlalu tipis. Perbedaan ketebalan tersebut dapat menyebabkan proses pengeringan tidak seragam dan meningkatkan kemungkinan munculnya retak.
Teknik aplikasi perlu disesuaikan dengan kondisi permukaan. Pastikan plesteran diratakan dengan baik sebelum dilanjutkan ke proses acian.
5. Tidak Memberikan Waktu Pengeringan
Plesteran dan acian membutuhkan waktu agar lapisannya mencapai kondisi yang sesuai sebelum dilanjutkan ke tahap berikutnya. Jika acian atau finishing dilakukan terlalu cepat, lapisan di bawahnya masih dapat mengalami perubahan selama proses pengeringan.
Kondisi tersebut bisa memicu masalah seperti retak rambut, permukaan tidak stabil, atau lapisan finishing kurang optimal. Karena itu, jangan hanya mengejar pekerjaan cepat selesai; berikan waktu yang cukup pada setiap tahapan.
Mengapa Bahan Campuran Semen Milan Cement Additive Penting dalam Komposisi Plesteran dan Acian?
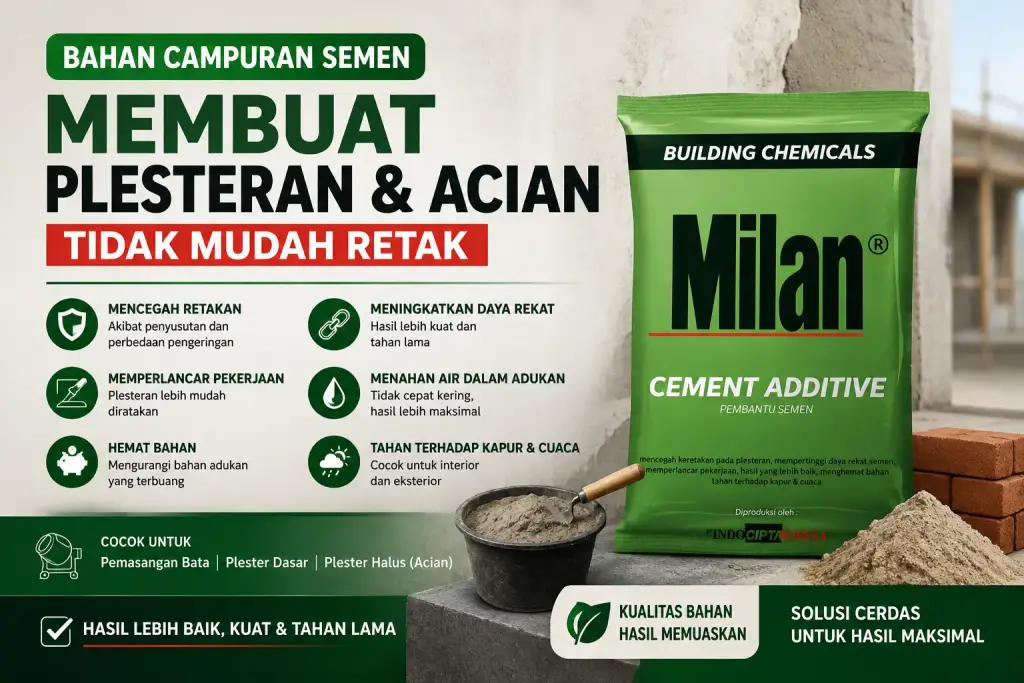
Dalam pekerjaan plesteran dan acian, kualitas campuran semen sangat berpengaruh terhadap hasil akhir. Milan Cement Additive dirancang sebagai bahan tambahan semen yang membantu meningkatkan kualitas campuran serta mengurangi risiko keretakan pada plesteran dan acian.
Kehadiran Milan Cement Additive dapat membantu meningkatkan adhesi antara semen dan substrat sehingga hasil pekerjaan lebih kuat dan rapi.
Milan Cement Additive dapat digunakan pada aplikasi dinding bata, beton, dan plester semen, baik untuk area interior maupun eksterior. Produk ini juga ditujukan untuk pekerjaan rumah tinggal, bangunan komersial, renovasi, hingga pembangunan baru.
Beberapa keunggulan Milan Cement Additive antara lain:
- Membantu menahan air tetap berada dalam adukan semen
- Mengurangi bahan adukan yang terbuang
- Membantu mengurangi keretakan akibat perbedaan proses pengeringan
- Membantu plester tidak cepat kering sehingga lebih mudah diratakan
- Membantu meningkatkan daya rekat plester
- Tahan terhadap kapur dan cuaca
- Cocok untuk plesteran dan acian
Cara Menggunakan Milan Cement Additive sebagai Bahan Campuran Semen dalam Plesteran maupun Acian
1. Siapkan 1 zak semen seberat 40 kg sebagai bahan utama campuran.
2. Untuk plester dasar, campurkan 1 zak semen dengan 1–2 pak Milan Cement Additive, lalu aduk bersama pasir halus dengan perbandingan 1:3–4 hingga tercampur rata.
3. Untuk plester halus atau acian, campurkan 1 zak semen dengan 1 pak Milan Cement Additive, kemudian tambahkan air secukupnya hingga membentuk pasta yang siap digunakan untuk menghaluskan permukaan dinding.
4. Untuk pemasangan batu bata, campurkan 1 zak semen dengan 1–2 pak Milan Cement Additive, kemudian aduk dengan pasir kali menggunakan perbandingan 1:3–5 hingga merata.
5. Tambahkan air secara bertahap pada campuran sesuai kebutuhan hingga mencapai konsistensi pasta yang tepat dan mudah diaplikasikan pada permukaan dinding.
Jadi, Mana yang Paling Penting dalam Pembuatan Dinding Rumah: Plesteran atau Acian?
Kalau harus memilih, sebenarnya tidak tepat mengatakan plesteran lebih penting daripada acian atau sebaliknya. Keduanya penting karena memiliki fungsi yang berbeda dan saling melengkapi.
Plesteran menentukan kualitas dasar dinding. Jika plesteran tidak rata, terlalu tebal, daya rekatnya buruk, atau mudah retak, acian akan kesulitan menghasilkan permukaan yang baik.
Sebaliknya, plesteran yang sudah bagus tetap membutuhkan acian jika targetnya adalah permukaan dinding yang halus dan siap menerima finishing.
Jadi, yang paling menentukan kualitas dinding bukan hanya memilih salah satu, melainkan memastikan seluruh rangkaian pekerjaan dilakukan dengan benar.
Mulai dari persiapan permukaan, komposisi adukan, aplikasi plesteran, pengeringan, hingga pengaplikasian acian harus diperhatikan.
FAQ (Frequently Asked Questions)
Bagaimana Urutan Plesteran dan Acian yang Benar?
Urutannya adalah pasangan dinding disiapkan terlebih dahulu, kemudian dilakukan plesteran untuk meratakan permukaan. Setelah plesteran berada pada kondisi yang sesuai, tahap berikutnya adalah acian untuk menghaluskan permukaan sebelum masuk ke proses finishing atau pengecatan.
Berapa Ketebalan Plesteran dan Acian yang Ideal?
Ketebalan tidak selalu sama karena bergantung pada kondisi dinding dan standar pekerjaan. Secara umum, ketebalan plesteran berkisar antara 10-20 mm, sedangkan acian 1-3 mm. Namun, ketebalan aplikasinya tidak bisa disamakan, tetap disesuaikan dengan kebutuhan bidang.
Mengapa Plesteran dan Acian Bisa Retak atau Mengelupas?
Penyebabnya dapat berasal dari permukaan yang kotor, komposisi campuran yang tidak tepat, ketebalan tidak seragam, daya rekat kurang baik, teknik aplikasi yang keliru, atau proses pengeringan yang tidak sesuai. Pemilihan bahan campuran semen yang tepat juga dapat membantu mengurangi risiko tersebut.
Berapa Biaya Plesteran dan Acian per Meter Persegi?
Biaya plesteran dan acian per meter persegi berbeda-beda tergantung harga material, jenis dinding, ketebalan pekerjaan, kondisi permukaan, lokasi proyek, serta ongkos tenaga kerja. Karena itu, perhitungan sebaiknya dibuat berdasarkan kebutuhan material dan harga tukang di lokasi proyek.
Mana yang Lebih Penting untuk Menentukan Kualitas Finishing Dinding?
Keduanya sama-sama penting. Plesteran menentukan kerataan dan kualitas dasar dinding, sedangkan acian menentukan kehalusan permukaan. Finishing dinding yang baik membutuhkan plesteran dan acian yang dikerjakan dengan benar, bukan hanya salah satunya.
Ingin Mengurangi Risiko Retak pada Plesteran dan Acian Dinding? Gunakan Milan Cement Additive!
Memahami perbedaan plesteran dan acian pada dinding rumah memang penting sebelum proyek berlangsung. Tapi, untuk mencegah agar plesteran dan acian tidak mudah retak sesaat setelah pengerjaan, pastikan campuran komposisinya tepat serta berkualitas.
Therefore, Milanians can use Milan Cement Additive sebagai bahan tambahan pada campuran semen untuk membantu meningkatkan daya rekat dan kualitas hasil plesteran maupun acian.
Jadi, jangan tunggu plesteran dan acian retak – segera cegah sejak awal dengan Milan Cement Additive!
Tertarik menggunakannya? Milanians bisa konsultasi kebutuhan proyek bersama Tim Ahli Milan dengan klik banner di bawah ini!